Use Cases for Blacklist Feature in Hijacker Monitoring | Seller4S
Why Do You Need a Blacklist Feature?
In Amazon product hijacking monitoring, you often encounter situations where certain sellers repeatedly hijack your products. Even after being removed, they may return after some time. Manually recording and managing these "repeat offenders" is not only time-consuming but also prone to oversight. The blacklist feature is designed to solve this problem.
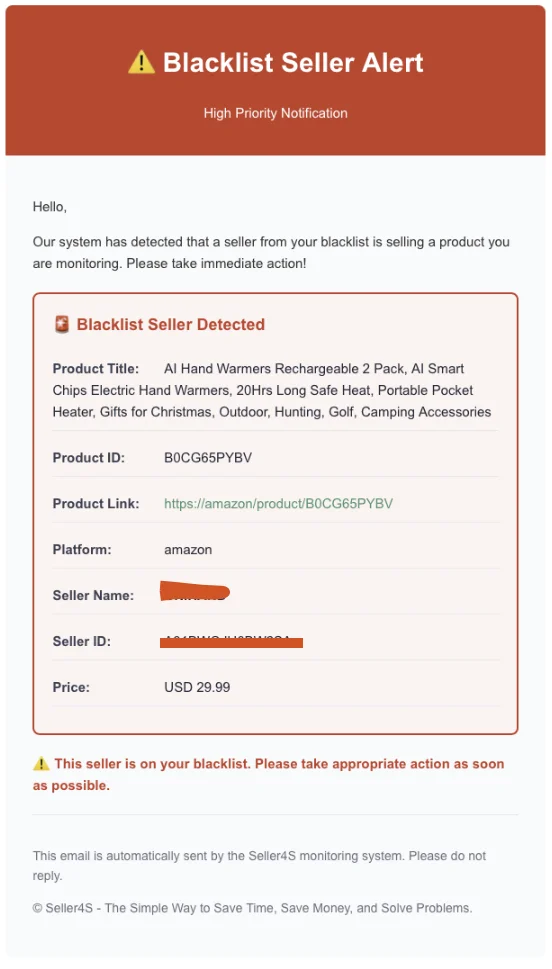
Email notification when a blacklisted seller reappears
Scenario 1: Identifying and Recording Repeat Hijackers
Problem Description
When you discover that a seller has hijacked your products multiple times, you need a way to quickly identify these "familiar faces" instead of investigating them from scratch each time.
Solution
- When First Detected: Add the seller to the blacklist in the Seller4S system
- Record Detailed Information: Save key information such as Seller ID, store name, etc.
- Add Notes: Record the seller's hijacking history, handling methods, and other information for future reference
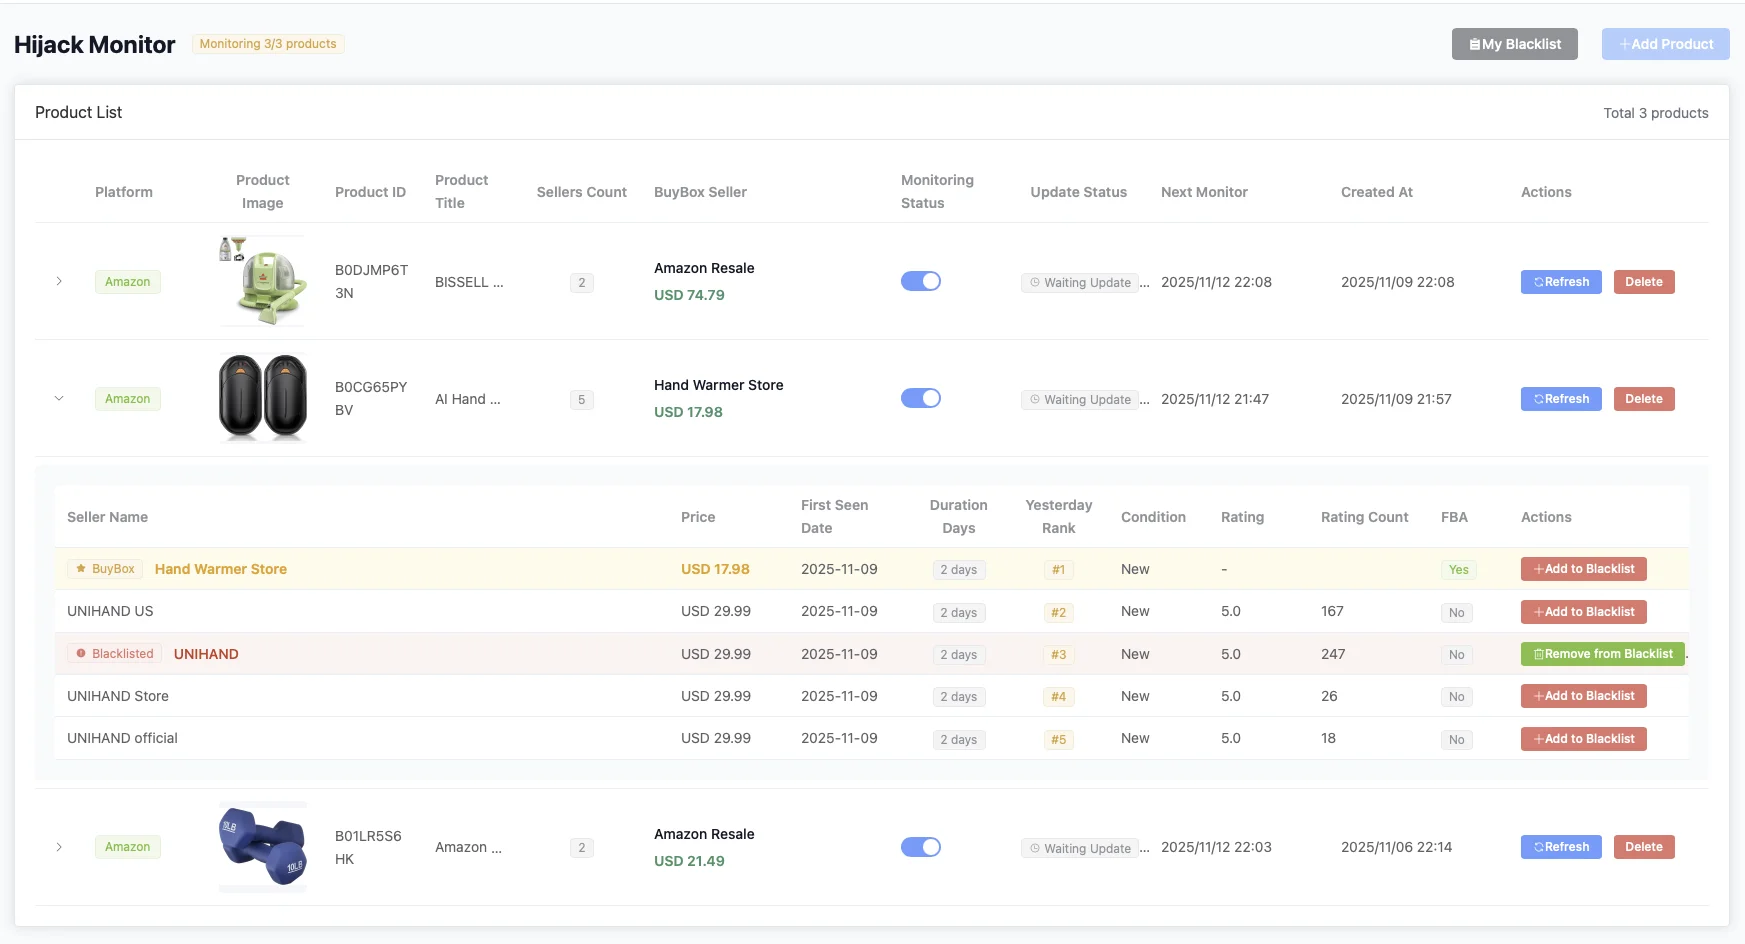
Managing blacklisted sellers in the monitor list
Real Case
A seller discovered that a store named "ABC Trading" hijacked 5 different products within 3 months. Through the blacklist feature, the seller marked this store as a blacklisted seller and noted the time and products of each hijacking. When this store appears on any monitored product again, the system immediately highlights it, reminding the seller to prioritize handling.
Scenario 2: Prioritizing High-Risk Sellers
Problem Description
Not all hijackers are equally dangerous. Some sellers only hijack occasionally, while others are professional "career hijackers" that need immediate attention.
Solution
- Create Tiered Blacklist: Classify the blacklist into different levels based on the seller's hijacking frequency and impact
- Set Priority Alerts: For high-risk sellers, set more frequent monitoring and instant notifications
- Quick Response Mechanism: When a blacklisted seller appears, the system automatically sends high-priority alerts
Real Case
An electronics seller divided the blacklist into three levels:
- Level 1 (High Risk): Sellers who have hijacked more than 3 times, set instant email + SMS notifications
- Level 2 (Medium Risk): Sellers who have hijacked 1-2 times, set daily summary notifications
- Level 3 (Low Risk): Suspected hijackers that haven't been confirmed, set weekly checks
Through this tiered management, the seller can focus limited energy on the most dangerous hijackers, improving handling efficiency.
Scenario 3: Cross-Product Monitoring of Blacklisted Sellers
Problem Description
When you have multiple products to monitor, a blacklisted seller may hijack different products. Without the blacklist feature, you would need to search separately in each product's monitoring report.
Solution
- Global Blacklist Management: Blacklisted seller information is shared across all monitored products
- Automatic Association Detection: The system automatically detects if blacklisted sellers appear on any monitored product
- Unified Notifications: Regardless of which product a blacklisted seller appears on, you receive alerts in a unified format
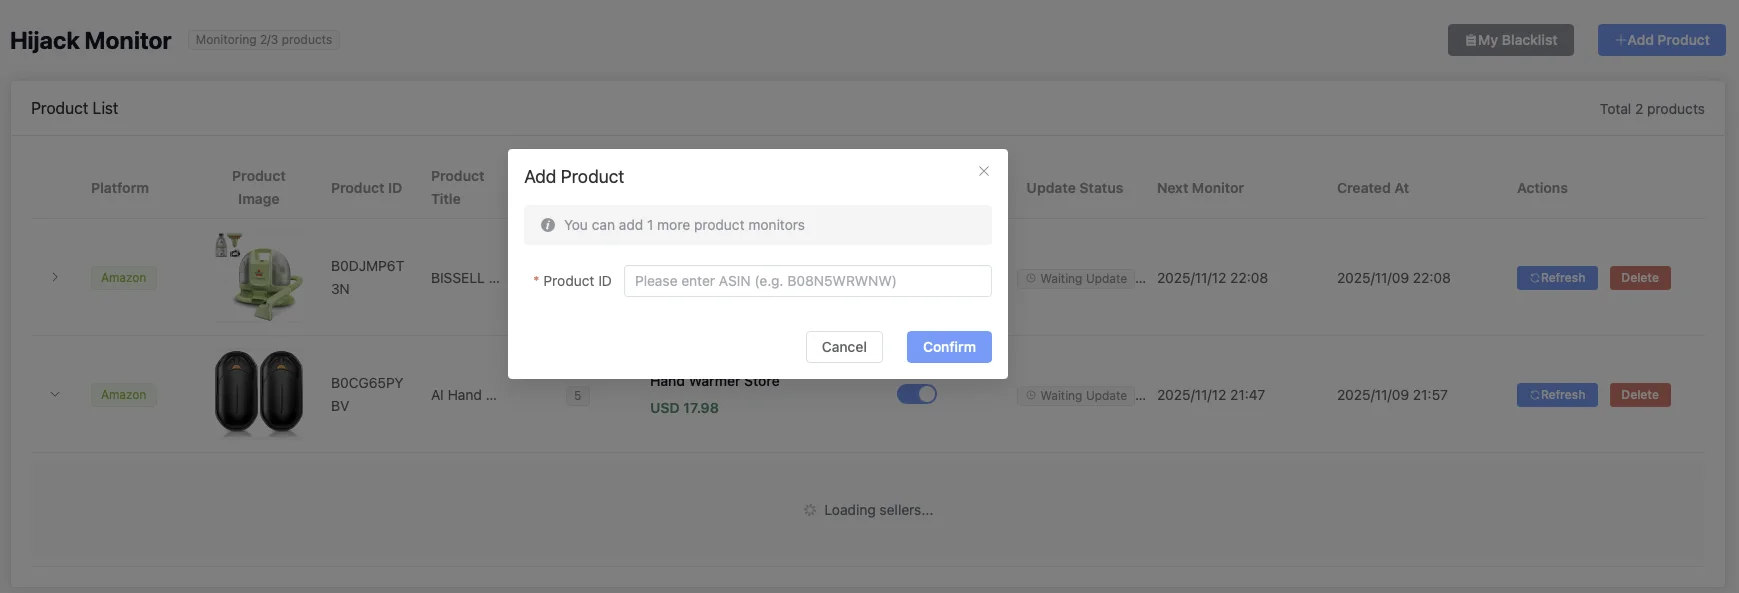
Blacklist automatically takes effect when adding new product monitoring
Real Case
A brand seller with 20 products added 15 repeat hijackers to the blacklist. When any of these sellers appear in the monitoring of any product, the system immediately notifies. Over the past 6 months, through the blacklist feature, this seller discovered hijacking an average of 2-3 days earlier, significantly reducing response time.
Scenario 4: Team Collaboration and Knowledge Sharing
Problem Description
In team operations, different members may handle different products, but hijacker information needs to be shared within the team to avoid duplicate work.
Solution
- Shared Blacklist: Team members can all view and update the blacklist
- Add Handling Records: Record the method and results of handling blacklisted sellers each time
- Experience Accumulation: Through blacklist notes, accumulate handling experience and form best practices
Real Case
A 5-person team uses Seller4S's blacklist feature, and each member updates blacklist information when handling hijacking. For example, member A discovered that a seller responds well to email warnings and records in the blacklist notes "can be resolved through email communication." When member B encounters the same seller, they can directly refer to the notes and choose the most effective handling method, avoiding repeated trial and error.
Scenario 5: Data Analysis and Trend Prediction
Problem Description
By analyzing blacklist data, you can discover patterns and trends in hijacking and prevent them in advance.
Solution
- Statistics on Hijacking Frequency: Analyze which sellers are most active and which products are most prone to hijacking
- Identify Time Patterns: Discover that certain sellers are more likely to appear during specific periods (such as promotional seasons)
- Optimize Monitoring Strategy: Adjust monitoring frequency and priority for different products based on blacklist data
Real Case
By analyzing 6 months of blacklist data, a seller discovered:
- 80% of hijacking incidents come from 20% of sellers in the blacklist
- These sellers become active one week before Prime Day
- Certain product categories (such as electronics) are more likely to be hijacked by specific sellers
Based on these findings, the seller strengthened monitoring of blacklisted sellers two weeks before Prime Day and prepared handling solutions in advance, successfully reducing hijacking incidents during Prime Day by 70%.
How to Use the Blacklist Feature
Adding Sellers to Blacklist
- In the monitoring report, find the seller that needs to be added to the blacklist
- Click the "Add to Blacklist" button
- Fill in seller information (Seller ID, store name, etc.)
- Add notes (optional but recommended)
- After saving, the seller will be marked as a blacklisted seller
Managing Blacklist
- View Blacklist: View all blacklisted sellers in system settings
- Edit Notes: Update seller notes at any time
- Remove from Blacklist: If a seller is confirmed to no longer pose a threat, they can be removed from the blacklist
- Export Blacklist: Export the blacklist as a CSV file for backup or other purposes
Setting Blacklist Notifications
In notification settings, you can:
- Choose whether to notify immediately when a blacklisted seller appears
- Set notification methods (email, SMS, etc.)
- Customize notification content to include more contextual information
Best Practice Recommendations
- Update Blacklist Promptly: Immediately add new repeat hijackers to the blacklist each time they are discovered
- Record Detailed Information: Record seller characteristics, handling history, and other information in notes for future reference
- Regular Blacklist Review: Review the blacklist monthly, remove inactive sellers, and maintain blacklist effectiveness
- Combine with Other Features: Use the blacklist feature in combination with monitoring frequency settings, notification settings, and other features to form a complete protection system
- Team Collaboration: Share blacklist information within the team to ensure all members benefit
Summary
The blacklist feature is a powerful tool in the hijacking monitoring system. It not only helps you quickly identify repeat hijackers but also comprehensively improves product protection efficiency through automation and data analysis. Whether you're an individual seller or team operation, proper use of the blacklist feature can make your hijacking monitoring work twice as effective.
Remember, the blacklist is not a one-time setup but a continuous optimization process. As you gain deeper understanding of hijackers, the blacklist will become increasingly valuable.